Soundprobe environment consists of the workspace, an area around the workspace into which you can place toolbars, the control bar located along the bottom of the main window, plus the menus of course.

Soundprobe has a variety of preset toolbars which provide you with quick access to all of the main functions. You can open all the toolbars and arrange them around the workspace, or you can open just the toolbars you use the most.
or
NOTE: some toolbars will dock only in the top toolbar area. To check if a toolbar will dock at the sides, move it to where you want to dock it - if the toolbar can be docked here, the highlighted area will change shape to fit vertically down the sides of the window.
|
Standard |
Selections |
 |
 |
|
Play |
Frequency |
 |
 |
|
Zoom |
Regions |
 |
 |
|
Direct FX |
Special FX |
 |
 |
|
Manual Editing |
Processing |
 |
 |
|
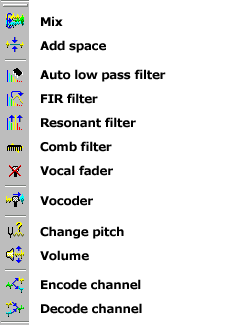
Restoration |
Enhancements |
 |
 |
A special bar is located at the bottom of the main Soundprobe window. This is the control bar. From here you can numerically enter the currently viewed area of sound and the selected area of the sound. It also gives you direct access to the frequency editing option plus enables you to numerically enter the currently selected frequency area. Located on the control bar are the most commonly used play buttons, zoom and selection buttons. There is also a VU meter for monitoring the sound level of either the sound output from Soundprobe, or the Windows input. In the centre of the control bar is the time at which the play cursor is currently located.

|
or
The VU meter is a special area of the control bar. You may change its appearance and the way it responds to sound, or you may hide it if its activity is distracting you. Hiding the control bar VU meter will also give more memory and CPU time to other parts of the program.
Soundprobe uses a multiple-document interface (MDI). This enables you to open many files at the same time, all within the same environment, and to view them one at a time, or many at once. In the case of Soundprobe, a document is a sound and all its information (i.e. rate , author, etc.), plus a list of markers, regions and the loop playlist.

|
Each open document has at least one view that enables you to see the sound stored in the document. For each view, Soundprobe opens a window within the main application window. The view is the area of the sound you wish to be displayed within its own window.
Soundprobe enables you to open multiple views, all associated with the same document. This enables you to see different areas of a sound at the same time and to easily copy and paste between them. Each view can have its own selection enabling you to make multiple selections and view different areas of the same sound.
Whenever you click on a view window you activate that view and the view's document; while this view is active its document will be used by effects to set the Apply To document each time you enter an effects dialog. If there is a selection made in the active view this is the selection that will be used for all editing while that view is active.
You can click on other non-view windows without changing the active document and view.
The view's title bar displays the name of the document; this will always be the same as the document's filename. Until a new document is saved for the first time its name will be ôUntitledö.
After you modify a document an asterisk will be displayed after the document name to indicate that the document has been changed but not yet saved, for example ômysound.aiff*ö.
Multiple views are indicated in the title bar by a colon after the document name, for example ômysound.aiff*:2ö means that this is the second view associated with ômysound.aiffö and that changes have been made since the last save.
 |
or
or
NOTE: Do not confuse the Window menu with the View menu. The Window menu contains commands which enable you to open and manipulate the display of view windows, whereas the View menu contains command which enable you to change aspects of the currently selected view, such as what kind of graph to display for example.
or
See Also: